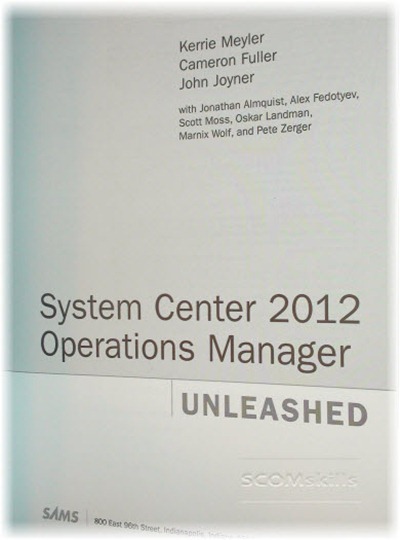
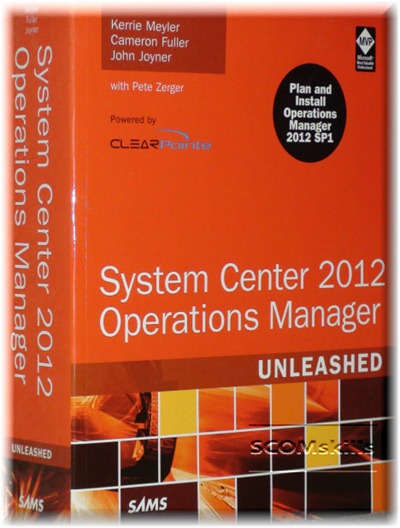
The Unleashed book is…well, UNLEASHED!

When I was asked to contribute to this book, I didn’t hesitate at the opportunity to be a part of what is considered to be the most comprehensive technical resource for System Center engineers and enthusiasts around the world. This is the first official publication I’ve been involved in, and am proud to have had the opportunity to share my experiences at this level.

I hope the community receives this book well, and that this edition lives up to its reputation! Thanks to Kerrie Meyler, Cameron Fuller, and John Joyner for doing such a great job in supporting the contributors and to keep things moving along.


Unleashed


Unleashed_2

Namespace prefix ‘maml’ is not defined

If you include knowledge articles in your management pack and fail to reference the maml schema, you’ll see this error during build time.


Error      80           Namespace prefix 'maml' is not defined


clip_image002


It’s a very easy fix. Simply add the highlighted below to the management pack fragment and build away.

<ManagementPackFragment SchemaVersion="2.0" xmlns:xsd="http://www.w3.org/2001/XMLSchema" xmlns:maml="http://schemas.microsoft.com/maml/2004/10">

Dual-Home Unix/Linux Agent (multi-home)

I ran into this request recently, but couldn’t find any official documentation on this. I’m sure this information is out there somewhere, but figured it’s a 2 minute post so here it is.

Turns out it’s actually quite easy, as long as you have your certificates lined up.

You’ll need to have all SCX certificates from every management server installed on every other management server that participates in a cross-platform resource pool. In other words, a complete certificate mesh between all multi-homed management groups!

Simply login to a management server that is a member of the cross-platform resource pool in the original management group, open a command prompt as administrator, navigate to %Program Files%\System Center\Operations Manager 2012\Server folder, and execute the following command:

scxcertconfig.exe -export xplat.cert


Next, copy that exported cert file to the same folder on each management server in the cross-platform resource pool in the second management group. Then import it by running the following command:

scxcertconfig.exe -import xplat.cert


Now you can run discovery/installation. The news is, no certificate signing or agent installation needs to happen, so it’s a very quick operation going forward.

Timed Script Discovery (vbscript)

AKA: Microsoft.Windows.TimedScript.DiscoveryProvider

If you are following these VSAE Fragment posts in order, you’ll see they are tied together in the same example management pack. This fragment demonstrates the timed script discovery provider, and discovers the application component class discussed in the previous post.

What does it do?

This discovery uses a script to read a local csv file (c:\ScomSkills.csv). The file is expected to have two entries, separated by a comma. Doesn’t matter what the entries are, as they will simply be discovered as class properties.

One thing I’d like to callout here is the discovery of Entity\DisplayName, highlighted below. It is important to discover PrincipalName or NetbiosName for Entity\DisplayName, because this is what the source will be when monitors targeting this class generate an alert. Ever see an alert generated by "c:" or "Windows Server 2008"? Not very useful while looking at a long list of alerts in the console, and doesn’t help much if you have other processes that are expecting computer name values for source. This is also discussed here.


<ManagementPackFragment SchemaVersion="2.0" xmlns:xsd="http://www.w3.org/2001/XMLSchema">
  <Monitoring>
    <Discoveries>
      <Discovery ID="SCOMskills.Demo.TimedScript.Discovery" ConfirmDelivery="false" Enabled="true" Priority="Normal" Remotable="true" Target="SCOMskills.Demo.LocalApplication.Class">
        <Category>Discovery</Category>
        <DiscoveryTypes>
          <DiscoveryClass TypeID="SCOMskills.Demo.ApplicationComponent.Class">
            <Property TypeID="SCOMskills.Demo.ApplicationComponent.Class" PropertyID="CsvField1"/>
            <Property TypeID="SCOMskills.Demo.ApplicationComponent.Class" PropertyID="CsvField2"/>
            <Property TypeID="System!System.Entity" PropertyID="DisplayName"/>
          </DiscoveryClass>
        </DiscoveryTypes>
        <DataSource ID="DS" TypeID="Windows!Microsoft.Windows.TimedScript.DiscoveryProvider">
          <IntervalSeconds>60</IntervalSeconds>
          <SyncTime/>
          <ScriptName>SCOMskills.Demo.Discovery.vbs</ScriptName>
          <Arguments>$MPElement$ $Target/Id$ $Target/Host/Property[Type="Windows!Microsoft.Windows.Computer"]/PrincipalName$ c:\ScomSkillsDemo.csv</Arguments>
          <ScriptBody>
            <![CDATA[
Option Explicit

Dim oArgs
Set oArgs = WScript.Arguments
if oArgs.Count < 4 Then
   Wscript.Quit -1
End If

Dim SourceID, ManagedEntityId, TargetComputer, SourceFile

SourceId = oArgs(0)
ManagedEntityId = oArgs(1)
TargetComputer = oArgs(2)
SourceFile = oArgs(3)

Dim oAPI, oDiscoveryData, oInst
Set oAPI = CreateObject("MOM.ScriptAPI")
set oDiscoveryData = oAPI.CreateDiscoveryData(0, SourceId, ManagedEntityId)

Dim oFso, oFile, aField
Set oFso = CreateObject("Scripting.FileSystemObject")

If (oFso.FileExists(SourceFile)) Then
Set oFile = oFso.OpenTextFile(SourceFile)
aField = split(oFile.ReadLine,",")

set oInst = oDiscoveryData.CreateClassInstance("$MPElement[Name='SCOMskills.Demo.ApplicationComponent.Class']$")
call oInst.AddProperty("$MPElement[Name='Windows!Microsoft.Windows.Computer']/PrincipalName$", TargetComputer)
call oInst.AddProperty("$MPElement[Name='SCOMskills.Demo.ApplicationComponent.Class']/CsvField1$", aField(0))
call oInst.AddProperty("$MPElement[Name='SCOMskills.Demo.ApplicationComponent.Class']/CsvField2$", aField(1))
call oInst.AddProperty("$MPElement[Name='System!System.Entity']/DisplayName$", TargetComputer)
call oDiscoveryData.AddInstance(oInst)

Else

Wscript.Quit -1

End If

Call oAPI.Return(oDiscoveryData) 
]]>
          </ScriptBody>
          <TimeoutSeconds>30</TimeoutSeconds>
        </DataSource>
      </Discovery>
    </Discoveries>
  </Monitoring>
  <LanguagePacks>
    <LanguagePack ID="ENU" IsDefault="true">
      <DisplayStrings>
        <DisplayString ElementID="SCOMskills.Demo.TimedScript.Discovery">
          <Name>SCOMskills Timed Script Discovery</Name>
        </DisplayString>
      </DisplayStrings>
    </LanguagePack>
  </LanguagePacks>
</ManagementPackFragment>
Microsoft Windows Application Component class type

AKA: Microsoft.Windows.ApplicationComponent

Here is another post in the VSAE Fragment category, building on the Microsoft Windows Local Application class in the previous example. This is another common class type to use while authoring a custom management pack, as discuss here. Use this class to discover components hosted on your custom Local Application class. This could also be considered a type (or server role) of the hosting class.

What does it do?

Discovers a component (or type/role) that is hosted by the seed class discovered in the previous example. You will notice here the highlighted hosting relationship also needs to be discovered, since this isn’t automatically included in the Microsoft Windows Application Component class type.  Monitors targeting this class will not automatically rollup to the Windows computer, so long as you do not create a dependency or hosting relationship on local application. This class requires a relationship with it’s base class, which is typically the seed class. If the seed class is local application, then it will automatically rollup to windows computer, and in some cases this is not what you want. In many cases, you might want to target your base class, which would be targeting Windows operating system (more on that later – look at the best practices category).

<ManagementPackFragment SchemaVersion="2.0" xmlns:xsd="http://www.w3.org/2001/XMLSchema">
<TypeDefinitions>
<EntityTypes>
<ClassTypes>
<ClassType ID="SCOMskills.Demo.ApplicationComponent.Class" Abstract="false" Accessibility="Public" Base="Windows!Microsoft.Windows.ApplicationComponent" Hosted="true" Singleton="false">
<Property ID="CsvField1" Key="false" Type="string"/>
<Property ID="CsvField2" Key="false" Type="string"/>
</ClassType>
</ClassTypes>
<RelationshipTypes>
<RelationshipType ID="LocalApplicationHostsApplicationComponent" Base="System!System.Hosting" Accessibility="Public">
<Source ID="LocalApplication" Type="SCOMskills.Demo.LocalApplication.Class"/>
<Target ID="ApplicationComponent" Type="SCOMskills.Demo.ApplicationComponent.Class"/>
</RelationshipType>

</RelationshipTypes>
</EntityTypes>
</TypeDefinitions>
<LanguagePacks>
<LanguagePack ID="ENU" IsDefault="true">
<DisplayStrings>
<DisplayString ElementID="SCOMskills.Demo.ApplicationComponent.Class">
<Name>SCOMskills Application Component Class</Name>
</DisplayString>
<DisplayString ElementID="SCOMskills.Demo.ApplicationComponent.Class" SubElementID="CsvField1">
<Name>CSV Field 1</Name>
</DisplayString>
<DisplayString ElementID="SCOMskills.Demo.ApplicationComponent.Class" SubElementID="CsvField2">
<Name>CSV Field 2</Name>
</DisplayString>
<DisplayString ElementID="LocalApplicationHostsApplicationComponent">
<Name>Local Application class hosts Application Component class</Name>
</DisplayString>
</DisplayStrings>
</LanguagePack>
</LanguagePacks>
</ManagementPackFragment>